
Upgrades:
Okay so you have four different combinations when it comes to fielding Predators.
You have what I call the Dakka Predator with an Autocannon, and Heavy Bolter Side Sponsons at 85 points. Great for anti infantry duty and dirt cheap too.
You have the triple Lascannon Predator (annihilator or destructor?) which is very pricey for 165 points. It is three powerful S9 hits on AV 10-13 though, but it doesn't fit my playstyle (I have 14 Multimeltas). But hey if you like Lascannons why not?
You have the AutoLas Predator (Autocannon turret and 2 Lascannon Sponsons). This one is cheaper at 120 points so it is the secondhand Predator. But hey it can take out your monstrous creatures and tanks though.
Then there is the Vanilla Predator where you get the best of both worlds. It's got a Twin Linked Lascannon and Heavy Bolter Sponsons. You can take out tanks but its limited to one shot that is guaranteed to hit. Then you have the infantry slaying capability. It doesn't have a dedication to anti infantry or anti tank. It clocks out at 130 points so it's not too bad but it is unusual and you probably won't see it on the gaming tables. Unless Predators get machine spirit (probably not) and shoot a lascannon at say a Rhino and the Heavy Bolters on a Tactical Squad. Otherwise you probably won't see it at all.
Then you can get a Storm Bolter and an HK Missile too since they are 10 points each. Just adding on those extra shots can be nice since the Predator is a static tank and you want it shooting as many shots as it can. But hey you don't have to but most people may just stick with the HK Missile on Predators. Although, they never hit for me and when they do, they fail but I think that's just me.
And this is the most important rule too. Field AV 13 tanks in triplets. Whatever variant you play, spam it. That's why I have 3 Dakka Predators. So if one gets shaken or destroyed, I still have two more that can pump out a lot of shots and that's what counts. No crazy mediocre stunts and take 1 Vindicator, 1 Whirlwind, and 1 Predator for Heavy Support. If you want Predators, take 3. It just doesn't make much since to just take one, unless it's just a small point game and you wanna play one just to see how you like it.
Tactics: Okay so now we get to the complicated stuff. Pay close attention to what I'm about to tell you. No matter the mission, and no matter the deployment, deploy your Predators where the opponent will MOST LIKELY be during the game. That means that you will probably just want one turn of moving 6 inches or 12 inches to get a good firing position on the enemy. You can use objectives to your advantage hare and place them out in the open, where your opponent will likely be so you can shoot at them. But again it really depends on each game since you have to estimate where the opponent's movements will be. You want to be able to pivot and get good LOS on enemy units. Having cover would be nice too, but it may not have to be a main priority since you can create terrain with some of your other models (Rhinos, Razorbacks, Dreadnoughts). But then here's the problem, what are you gonna do against deep strikers, suicide melta units, and assault units that just hit you and shake you so you can't use your guns. Well that's where bubblewrap units, and LOS blocking terrain comes in....
Deployment: Okay so here's some ideas that I have when it comes to deploying your Preds in Dawn of War but this isn't all there is but it is a deployment that can be tricky to use just because most of your army is in reserve and come from the table edge.


Now here's what these tanks can see....

 If they move to the middle ot the table, the Preds can pivot and get shots at the enemy. See? After a turn of just moving, I'm already in a good position to start shooting.
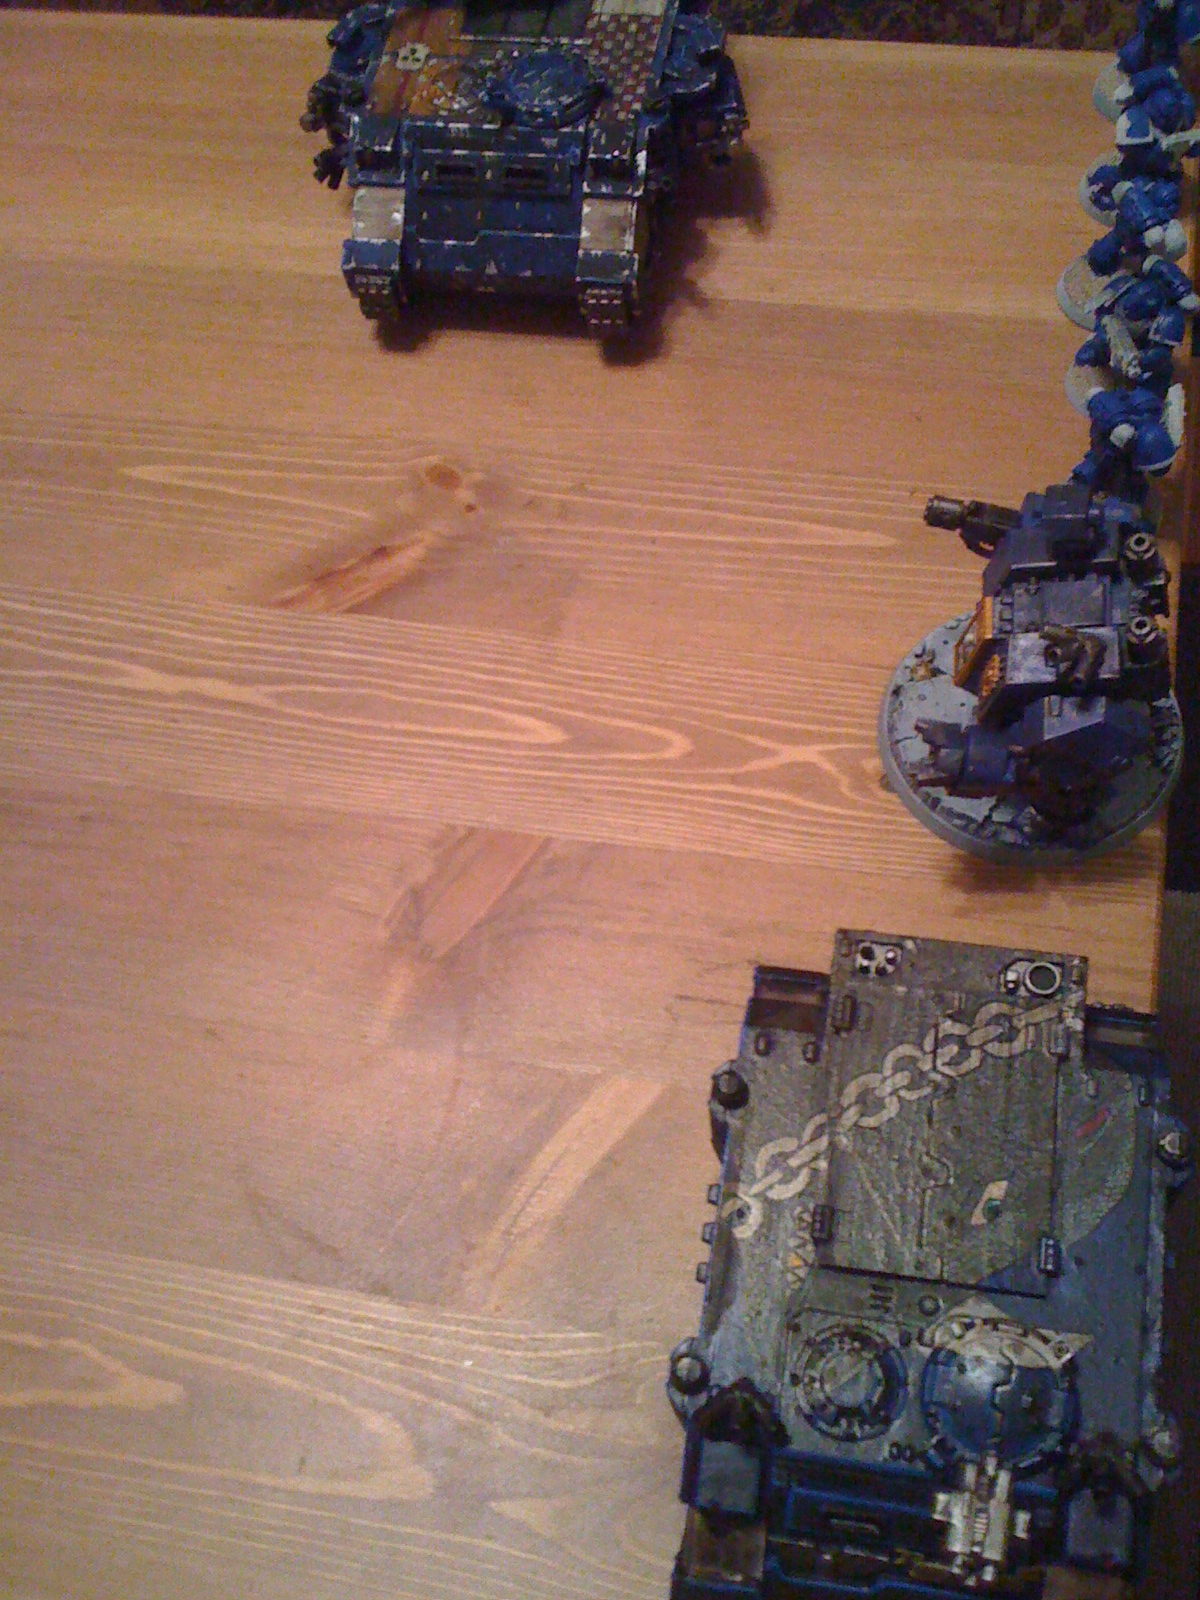
 Here's an aerial shot so you can see how I pivot them. All the weapons can shoot.
 Enemies on the right side? Okay cool I can pivot there too. But this is not considering how much terrain there would be. As you can see, a plain midfield equals a blood bath with shots. Now yes you have to take in consideration which weapon sponson can see what, but this deployment can help level the playing field with what can see and shoot at what. I deployed on the far right of my kitchen table but you can also do this on the right side of the table too. But then the Predator that lines up on the far right will pivot instead so the other Predators can proceed to move right instead of left. Argh! I hope that doesn't sound too confusing! The weaknesses I see with this is if the opponent outflanks, that's a problem for the rear ends of those tanks. Then there's the problem with incoming units coming towards the Predators but we will go over that. And lastly, a pie plate can hit two tanks at the same time so beware because if they can get two tanks on the side, that probably means both tanks can't shoot next turn! And they are also in danger of a multi assault and that means that they will also get auto hits, then boom goes the tanks.
Now for Deployment B using the same mission Dawn of War.


 Now to address the problem with assaulters, suicide melta units, outflankers, and deep strikers. Use 3 Tactical Squads and combat squad. Then use that 5 inch or 6 inch space depending on your preference, to place those marines first turn like so.
 Here's an aerial view of it all.
The bubblewrap is easily targeted, but hey look on the brightside! They aren't shooting at the Preds eh?
 See how the Dreadnought tries to get the 12 inch Melta range? Now it's only 1 roll for penetrating but it can assault, yet the marines block it's way.

 Now the Speeder can't get to me!
 But then there is the Drop Pod threat with this deployment right? Well keep a good 6 inch distance if there is one. See the Dreadnought there? He can barely squeeze through here if he's coming out of a pod. And the Pod can barely fit there too even if I don't have one there to plainly see.
 Now for Deployment C, which is very different from the previous ones. Just because it relies on my own army synergy and utilizing it in a nice defensive deployment.

Here's how everything else sets up first turn I've got Rhinos and Dreadnoughts for support.
 Here's how everything moves out. I've got my firepower spread out with the Predators and I have my Tactical Rhinos to help block of side shots off my AV11 Predators, utilizing that AV13 as much as possible.


Well, guys that's what I have for now in terms of deployment options with your Predator tanks. I hope you guys find this tactica very informative and helpful. Hopefully you can look at your army list, find what type of Predator suits you, and can adapt these tactics to your playstyle as well. More to come...
No comments:
Post a Comment